


When you’re about to embark on a 6 month camping trip around Australia, efficient use of space and everything having it’s place is essential. With over 100 potential set-ups and pack-ups each taking around an hour, you could be wasting a lot of time being unorganised.
Where to start
I wouldn’t call us vastly experienced campers but Jane and I have done at least a dozen trips together, using a tent and more recently our camper trailer, so we had a rough idea of what ‘essential’ equipment was needed, and what are ‘if they fit’ items. If you don’t, I’d recommend doing some research, there’s plenty of info on the internet.
We put together a big list and then split that list into two, the vehicle and the camper trailer. When splitting the list you need to remember you will be embarking on trips away from camp in the vehicle, so no point storing things you’ll need like your recovery equipment in the camper toolbox.
This is our list of essentials for the vehicle.
- Recovery gear – snatch strap, shackles etc.
- Puncture repair kit, tyre deflator, air compressor, wheel chocs
- Hi Lift Jack & accessories
- Axle stand
- Axe
- Tools
- Spares for the vehicle – hoses, belts, engine oil, coolant, power steering and brake fluid
- Second battery to run the fridge whilst in car. We opted for a 75Ah Thumper, instead of a dual battery system as it has a few extra features, like the ability to remove it and use it as a 12V power source and also a jump starting device. It also avoids the fridge draining the car battery should the Thumper run low on charge.
- Fridge and slide
- Luggage
- Deck chairs
- Art equipment
- School/learning equipment – as the boys will be keeping up with their learning while we travel.
- Boys need sports stuff, so we had to include the cricket set, football, soccer balls, boogie boards and snorkelling equipment.
- Photography equipment and digital devices (laptops and iPads)
The solution
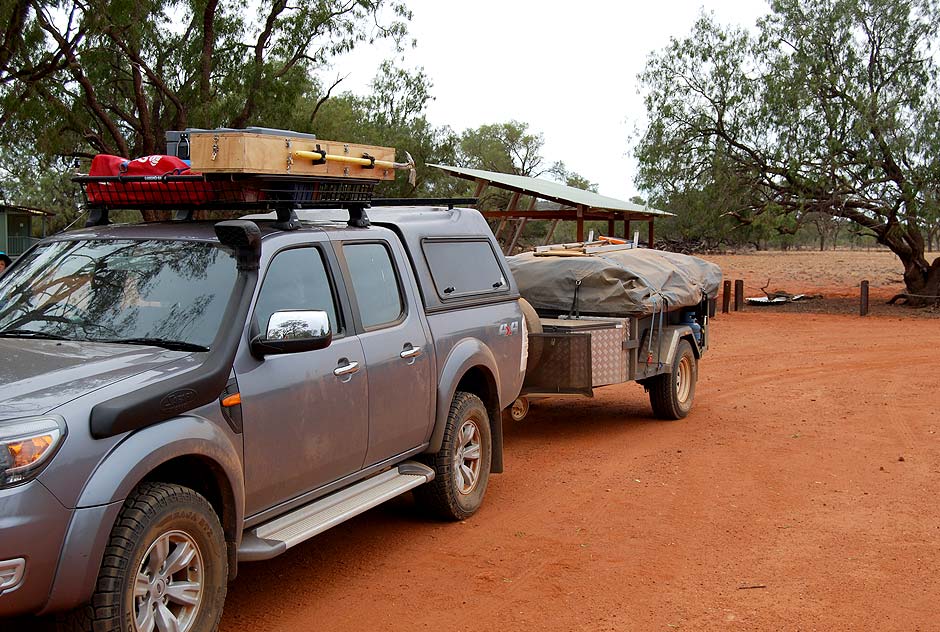
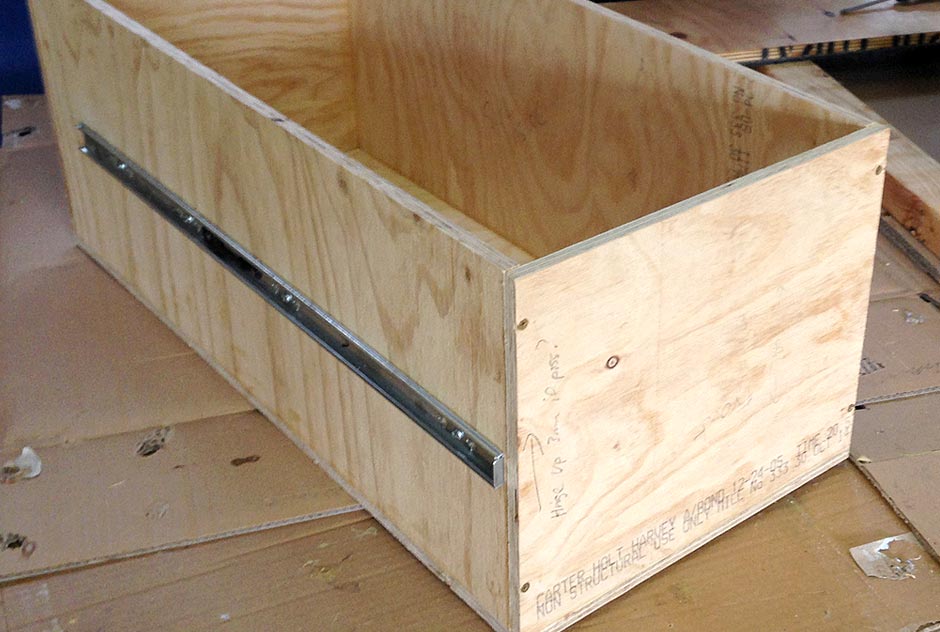
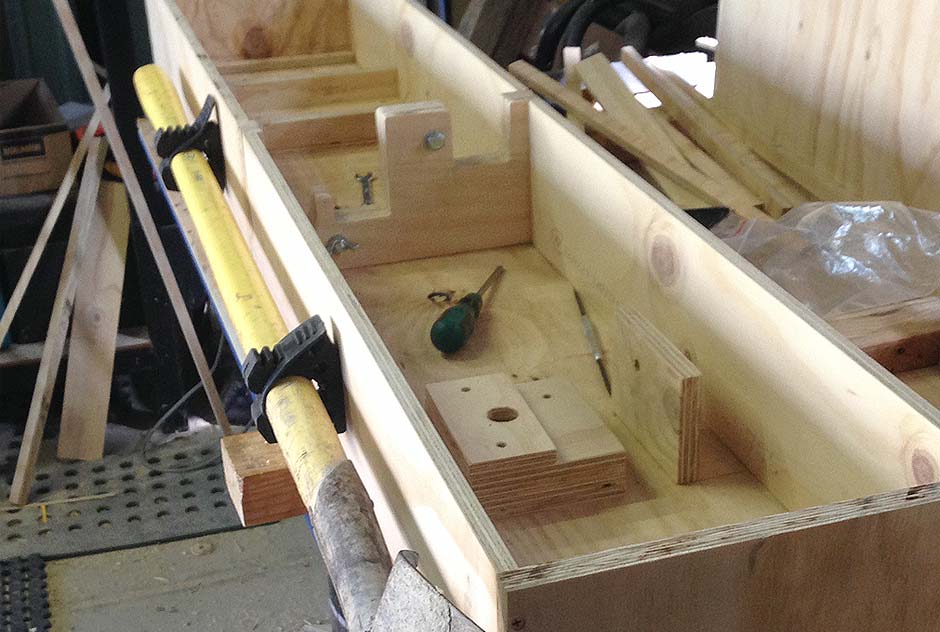
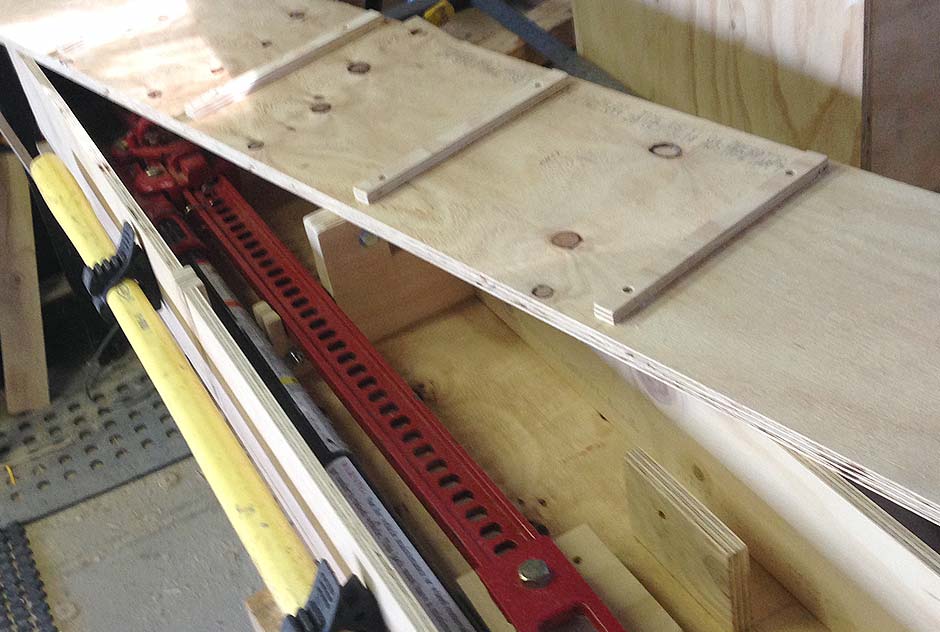
After much playing with space using scale models, a final layout was decided upon and building commenced. As you’ll see from the photos above the design is pretty straight forward, and some may say why didn’t you just buy something. The primary reason for that is I wanted to customise the solution to our needs, and use all available space. Even the spaces above and behind the wheel arches are used to store parts and 12V cables and most importantly, it’s just so much more satisfying to make it yourself.
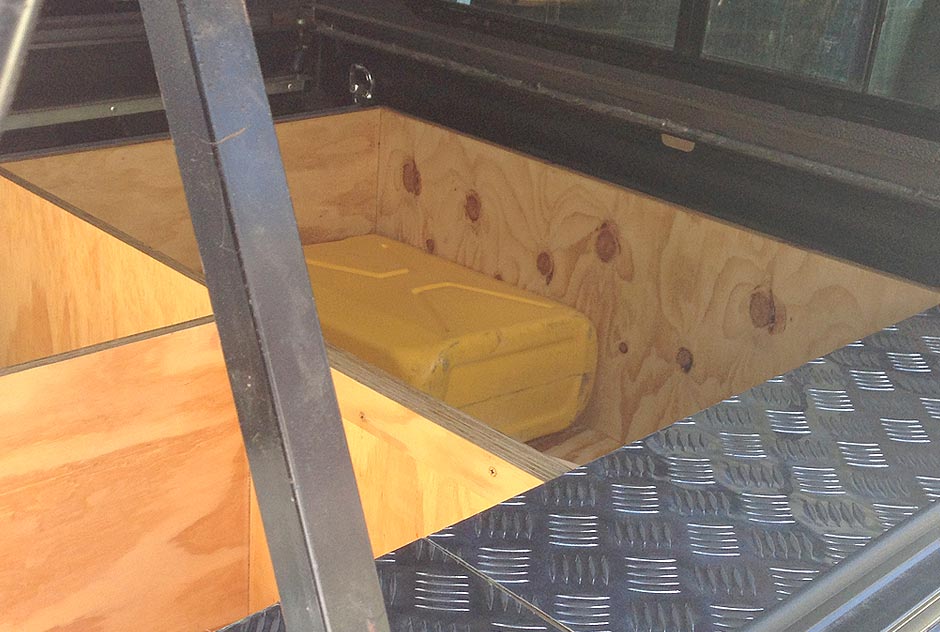
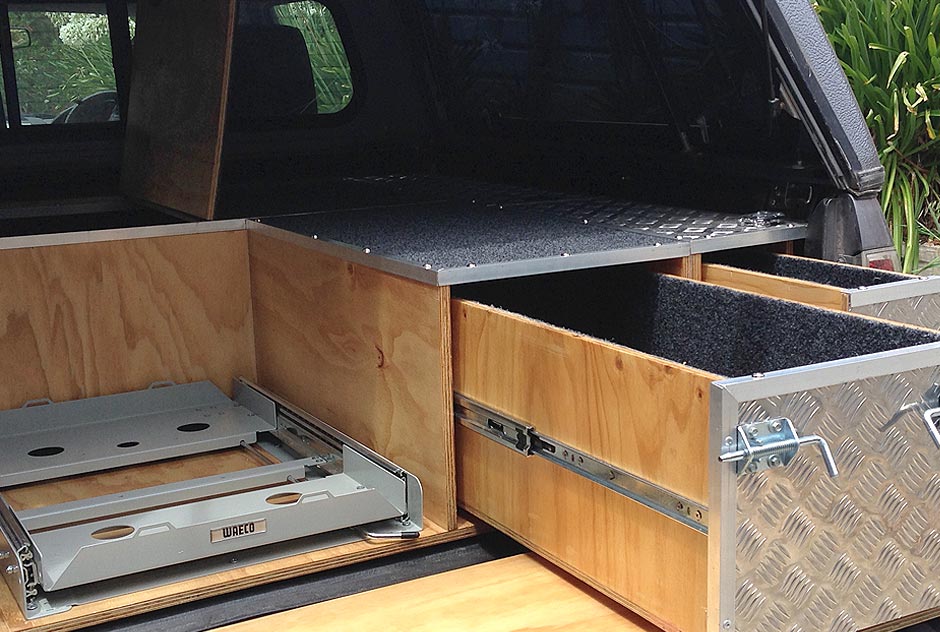
On the right hand side is the aluminium tread plate clad, plywood tool box which has a narrow drawer that houses the air compressor and tyre deflator, for easy access. Behind this is a storage compartment I’ll use for the spare parts, fluids and some tools, this section boxes in the drivers-side wheel arch.
Between the wheel arches is a large box, which houses the Thumper battery, and kids sports equipment – boogie boards, snorkelling equipment cricket stuff etc, plus another tool box and the odd towel to take up space. As these items only need to be accessed once camp is set up they sit under the luggage floor.
Over the passenger-side wheel arch is another storage compartment for the Solar panel cables, jumper leads and any other 12V related equipment.
Space for the fridge and slide is obvious, then next to that is a larger drawer. We decided to include a roadside break station off the back of the ute, eliminating the need to unpack the trailer for morning/afternoon tea or lunch breaks. In the drawer we carry some cutlery and crockery, basics like butter, vegemite, jam, tea. A butane gas burner to boil the kettle or use the pan to toast a sandwich, it also houses the first aid equipment. On the tailgate I’ve included a flat surface to create a counter.
The aluminium tread plate toolbox is designed to stay in the vehicle all the time to carry tools, ropes etc, when not camping, but the rest can slide out so we can use the vehicle as a ute as there’s need to carry firewood, boxes of printing, artworks, etc.
Recovery gear, where will that fit?
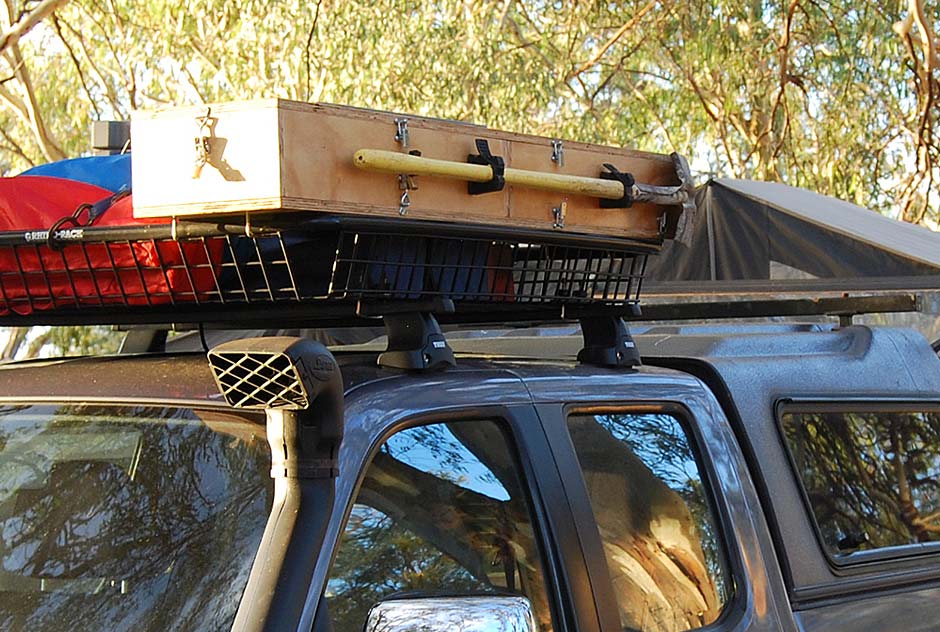
As the back of the ute began to take shape and the rest of the crew focussed in on what luggage they’d take it became obvious we’d need some more space. We decided to invest in a cargo basket for the roof of the ute.
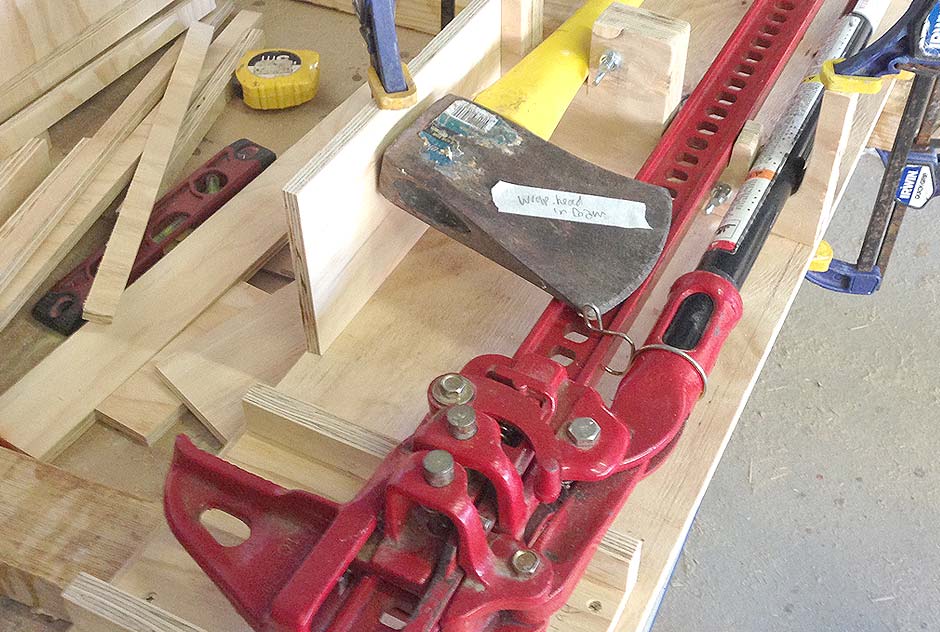
Once installed, I set about working out how I’d fix the Hi-Lift jack and shovel to the rack, there are commercially available brackets, but I had the idea combine both the housing of the jack and some recovery MaxTrax or Treds (commercial brands) in the one unit. A box to house the jack and as an added bonus an axe, then the lid and if required base could be used as recovery boards when bogged.
I figured I could make this unit for a fraction of the cost of purchasing the commercial gear and given where we intended to travel I was confident I could build something that would do the job. Don’t get me wrong I hear the Max Traks or Treds are brilliant to get you out of trouble in sand, as they act as both shovel and tread but for this trip we weren’t intending to do any major sand work. It was also pointed out by the financial controller (Jane) that every $1000 spent on gear is one week less on the road.
Decision made, make it.
For the rest of the recovery gear I bought a plastic weather proof box, which carries the axle stand, tyre repair kit, wire, cable ties, snatch strap, grease gun etc. One end of the deck chairs neatly slide under the jack box to help secure them.
How did it go?
Thankfully, in all our travels we never got bogged, so I can’t say if the recovery box idea was a success or failure but I do have a suspicion that the ‘treds’ may have been too long, other than that as a storage device it worked well. For the other aspects of the ute storage system, it passed a very thorough testing over six months and has returned in-tact although very dirty and dusty.